

Flooring 101
Ultimate Guide to Installing Wood Flooring
Today there are so many options for flooring. You have the ability to do vinyl-type floors, ceramic tile floors, and hardwood floors. Hardwood flooring is a great option for a timeless, elegant look that will raise the value of your home. Although it is not as durable as other flooring options, hardwood can be perfect in lower-traffic, low-moisture areas like bedrooms and dining rooms. Hardwood floors are wooden planks that are not mixed with any other materials. When laid correctly, you can bet you’ll have a gorgeous floor that will last for years. But unlike other forms of flooring, laying hardwood can be difficult, if you even know the steps to do it. So if you think you’re wanting hardwood in your new home or for your next project, let’s look at how to install wood flooring.

Prep Your Area.
You’re going to want to remove the baseboards and any current flooring materials (carpet, linoleum, vinyl planks, etc.). Pull your baseboards off and either try to save them for reinstallation or pull them off for disposal. Just make sure that when you’re taking baseboards and trims off, you’re being careful not to go through your drywall on accident!
If you have a carpet, take it all out, including the padding below, and get the tack strips and any staples or nails left behind pulled up as well. Note* Your tack strips are going to have a lot of sharp pieces. We recommend that you roll these strips in some of your removed carpets to keep from getting poked by any dirty or rusted pieces from the trips while attempting to dispose of them.
If you have subfloors now, double check none of the subfloor nails are poking up higher than they should, and if so, go ahead and level them back down with a hammer.
You’ll also want to check that your subfloors haven’t warped or sagged anywhere. If they have sagged too deeply, you can cause issues in your hardwood floors buckling and chipping after installation.
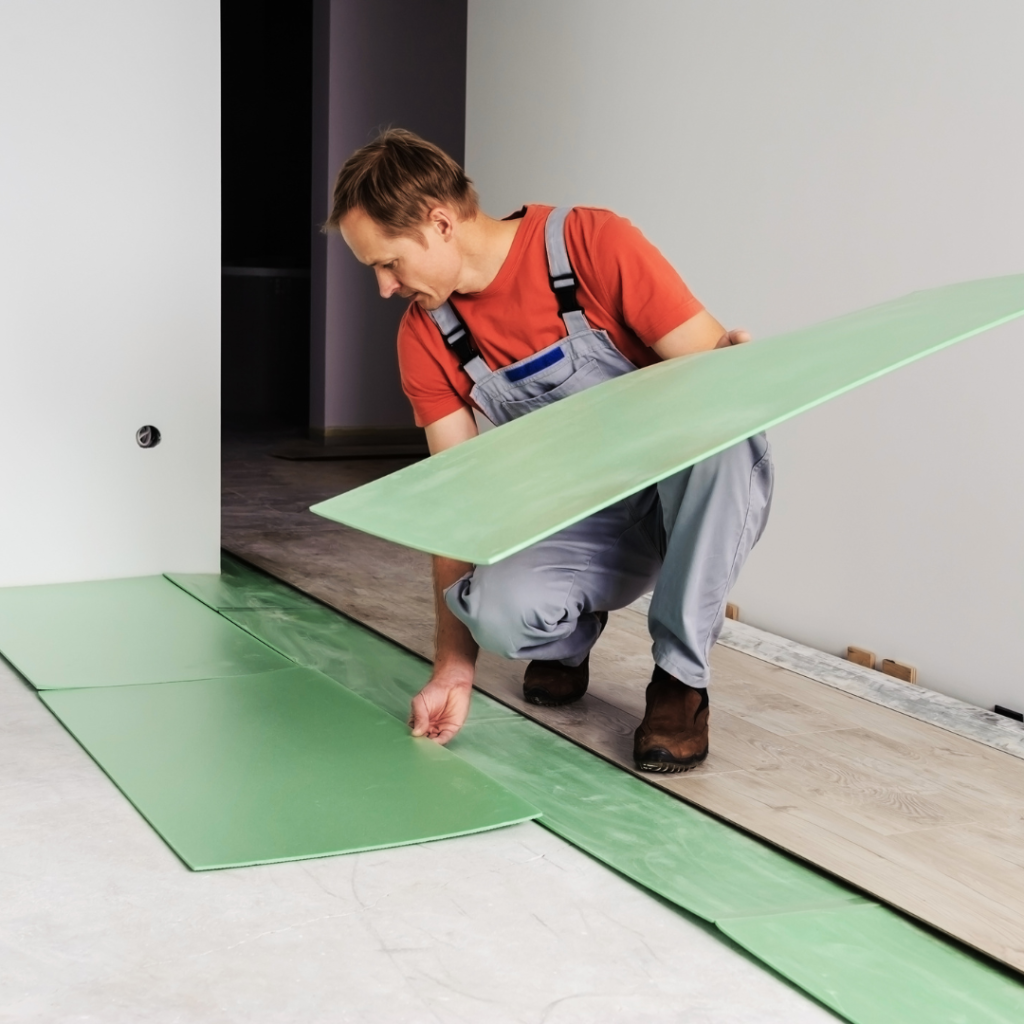
Vapor Barrier.
Once the floor is prepped and ready, you’re going to want to install what’s called a vapor barrier or commonly called underlayment. The vapor barrier is an important step in installing wood flooring. While some may boast of water resistance, no type of hardwood flooring is fully waterproof and moisture can warp and damage wood floors and subfloors. Underlayment helps reduce the amount of moisture coming in contact with your wood flooring and protects your subfloors from spills that may seep between the wood floorboards. Underlayment is available in different kinds of materials, but the plastic version with adhesive strips for overlapping is handy if you don’t want to put staples down. Make sure the sheets of underlayment are touching but not overlapping so that you can tape the sheets together while keeping the floor as level as possible. You should use a utility knife to trim the underlayment to fit against the perimeter of the room, making sure every bit of your subfloors are covered.
Laying Out Your Flooring.
It’s always highly recommended that you have the flooring sit in the environment and temperature that it will be installed and put in for a couple of weeks. You want to let the wood acclimate so that no warping or gaps appear after. Getting the wooden pieces out of the boxes to sit can help speed this process up.
How do you know your wood pieces are acclimated? What you are checking for is the amount of moisture within the wood, and a moisture meter can be purchased in a home improvement store. Follow the directions for your moisture meter, and it will tell you what range you want the moisture level to be at to know if your wood is acclimated or not.
When it’s time to start laying wood out, it’s recommended that you take wood from a couple of boxes of your flooring in order to keep from having any sudden color changes that may happen if you were to go one box at a time. Often, manufacturers will mix wood colors in their boxes for you to help avoid this color issue.
Once the flooring is acclimated to the temperature and humidity of your home, you’ll want to lay the boards down in the pattern you will be installing them. Take a step back to observe the entire room and make sure you like the direction the boards are laying. By laying out the flooring before installation, you can make adjustments to how the wood flooring will look before they are permanently installed. If you’re confident with the layout, you can begin cutting the boards during this step. During installation, you may need to trim the edges down further but preparing all of the materials ahead of time can make installing wood flooring quicker and easier.

Laying The Floor.
The next step in how to install wood flooring is finally to lay and install your pieces. It’s recommended that you leave about a half inch between the end of your boards and the wall to allow for seasonal expansion. With the change in the weather and temperature, the wood will expand, and you will want it to have room to do so or else damage your floor or walls. You can either use a line or a spacer to keep your half-inch for expansion and start the process of laying your flooring.
Traditionally wood flooring was more difficult to install and required countless small nails to keep the flooring in place but today many wood flooring options are as easy to install as laminate. If you find tongue and grove hardwood floorboards, you can follow our Ultimate Guide to Laying Laminate Flooring for step-by-step instructions for installing your wood flooring. Whatever type you purchase, make sure you follow the manufacturer’s requirements and suggestions for a successful installation.
Professional Flooring Contractor
Hopefully, the question of how to install wood flooring has been answered for you, and you can feel prepared and encouraged to lay your own! We make it sound easy but installing your own flooring can be a very time-intensive task and there’s a lot that can go wrong. If you want to leave it to the professionals, we’re happy to help! You can learn about all of your flooring options and schedule your free estimate at claytonhoover.com/flooring. Whatever flooring you decide on, Clayton Hoover & Sons is here to take the project from start to finish.